I’m not sure where I got this idea, possibly I made it up! In any case, the “pair programming circle” has turned out to be one of my favorite class activities. It helps students practice working with different partners and in different roles, helps spread individual knowledge around the class in a way that supports the shyer students, and (I think) is quite fun.
Here’s how it works:
Set up pairing stations: one computer for every 2 students. Number or label the stations in some way.
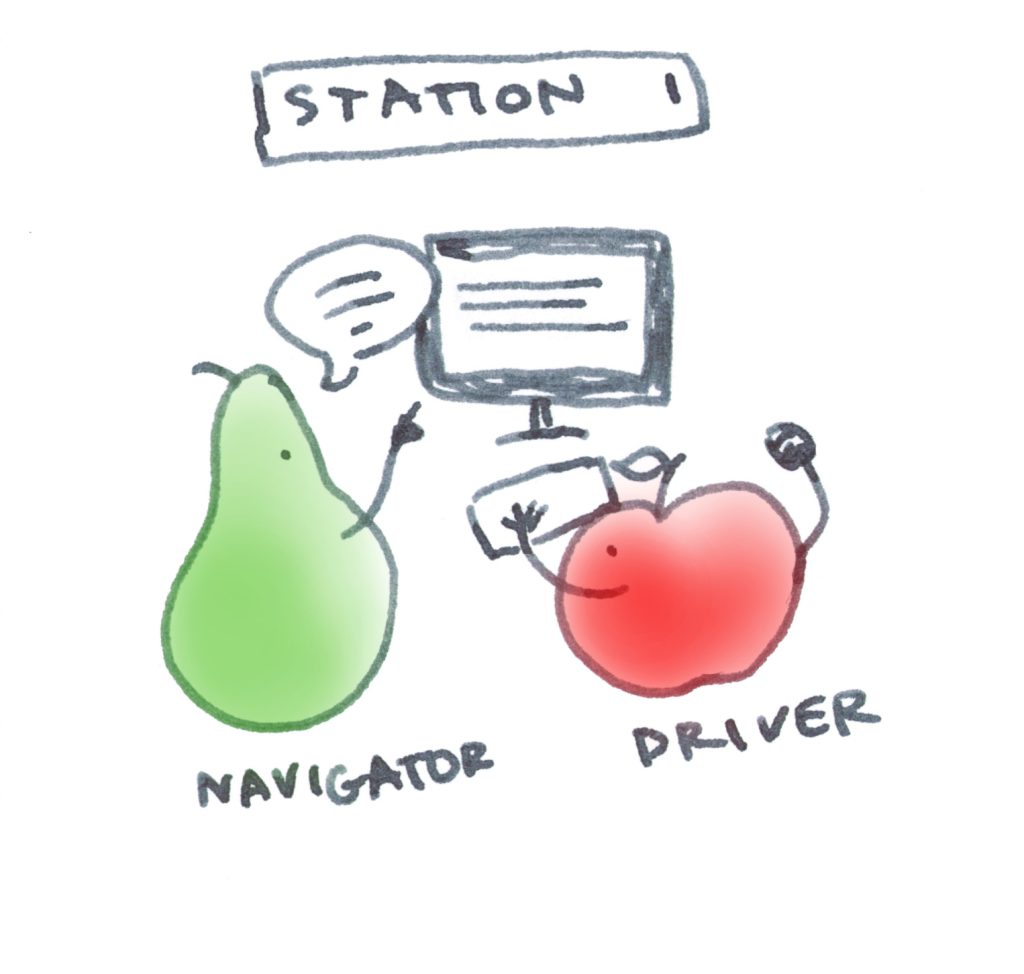
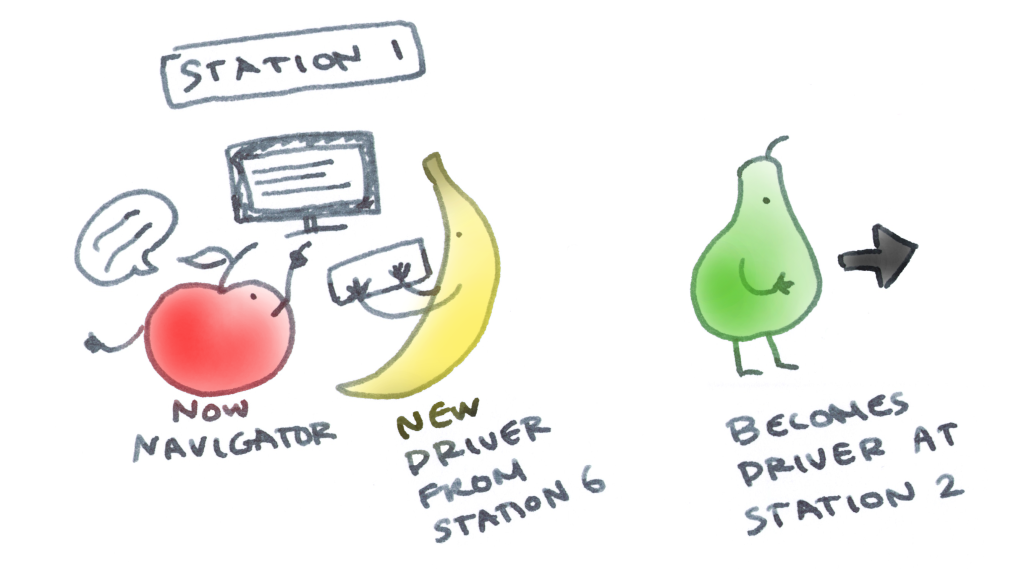
Students are randomly assigned to stations to work on a project in pairs. One student is designated the navigator, one the driver. After a set period of time, the navigator moves to the next station and becomes the driver for that station. The driver stays at the same station and becomes the navigator for a new driver from the previous station.
The computers stay where they are, and the code on that computer is built up by everyone who works at that station. One of my favorite things about this is watching students take a technique they figured out with their partner and teach it to their partner at the next station.
To help keep track of the stations, I wrote a Processing program to randomize pairs and tell everyone when to change stations. I display this on the projector. It looks like this:
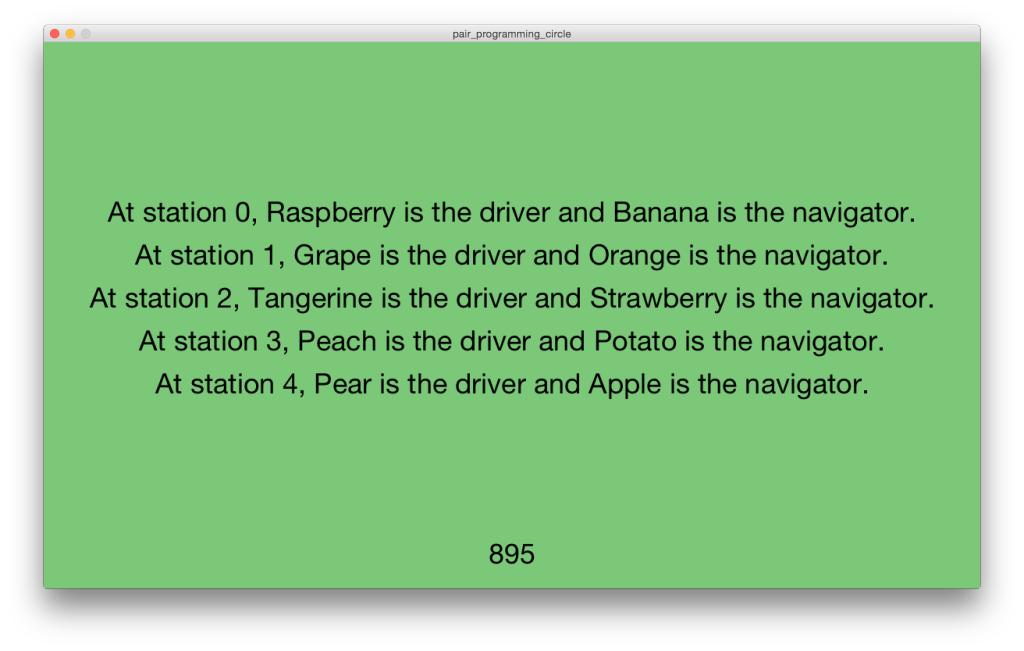
Here’s the source code. Install Processing to run. Edit the code to choose the length of time and teacher/student names (the teacher is included in the rotations if there is an odd number of students that day).
I put some thought into the switching order before setting this up. I like having the driver stay and become the navigator because it positions that person as an expert on the latest code who can catch the new driver up. I think it can boost confidence in students who feel less confident about their programming skills, and can help mix up any subtle power dynamics that the group has gotten stuck in. Especially if the teacher ends up in the rotations.
The biggest challenge with this activity is having enough time! I’m still figuring out the best timing for each rotation. I think around 15 minutes is a pretty good start. I set up the pairing stations ahead of time when I can because it’s amazing how much time that can take (takes students a little while to transition into class, understandably…and then there is always some unanticipated technical issue with student computers). The first time I ran this activity, I gave students some starter code and asked them to build on it however they wanted. I forgot to account for the time brainstorming & design take! Now I give them slightly more structured goals for this particular activity. If I had an extra prep day, I might have them do the brainstorming and design during the previous class in preparation for the activity.
I like to play this video to help explain the roles of driver and navigator. I’m still looking for the perfect pair programming video though. I like this one because it’s fun, short, and clear, but I really want to find a few minutes of video of programmers working on some specific code together to model what kinds of things they communicate about as they are working. They don’t show enough of the girls’ project here for that. If any programmers out there would be up for letting me film them during a pairing session to share with my students, please let me know! 🙂
(Side note about the comments on this video: it makes me sad to see peoples’ bizarre and straight-up harmful beliefs about what “coding” is and isn’t. Especially the programmers, who should know better! Scratch is Turing complete y’all!)
2 comments