I couldn’t find a picture before we bought this for our mini-kitchen-cabinets in progress (more on this soon! It’s been hectic.) but here is what an IKEA Karlby walnut + particleboard countertop looks like on the inside:

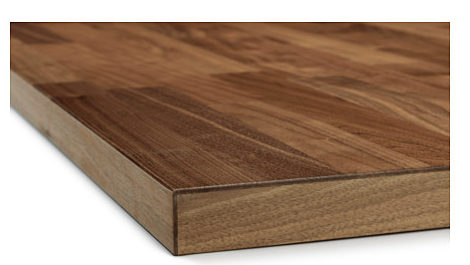
This is the countertop (picture from IKEA website):
And here’s the difference before and after learning to cut it properly (compare both cut edges):
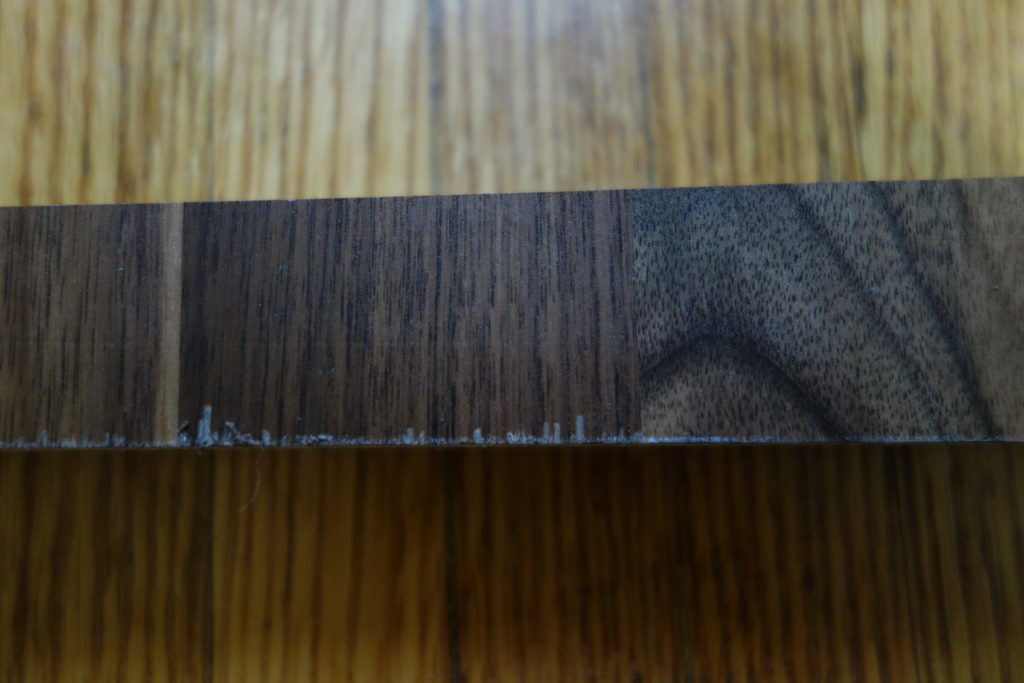
The trick, with a circular saw: cut it with the good side down, put blue tape over the cut line before cutting.
We are learning so much! I am currently stressing a little over a drawer handle that is the teeeensiest bit unlevel and hard to fix because we can’t easily patch holes in the white laminate. It’s probably okay.
I just recently installed an Oak Ikea countertop and the chip out were horrible on my test cuts. The grain in oak is larger.
You can pre-score the line with a utility knife to help with the chip outs.
Also, you can do a first pass, cutting only through half of the real wood material. Then do a final cut all the way through.
Great to know about scoring the line. With the cutting blade we had on, we found that putting the good side down and putting tape over the line made the difference.
I don’t understand what you mean by cutting through only half of the real wood though, unless the oak one has a lot more wood than the thin layer on the walnut?